|
“You push the button and we do the rest” is how
Kodak advertised their first Brownie box cameras back in the 1800’s.
From this humble beginning come the digital cameras of today with their auto
focus, auto exposure and auto color balance. In essence, cameras today are much
the same as they were then, you just point and shoot.
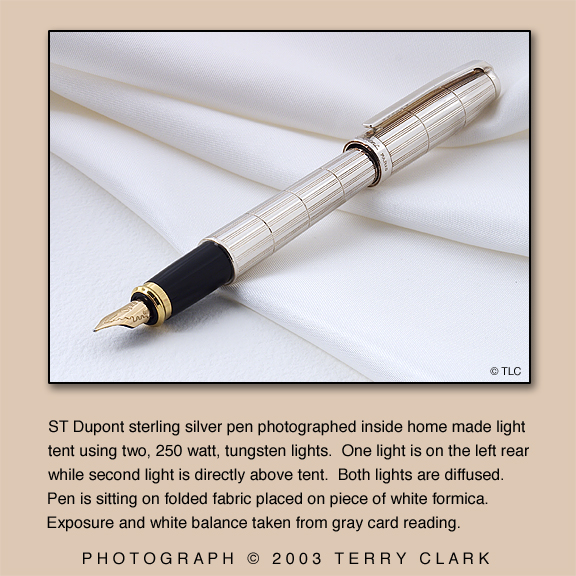
Unless of course your subject is a four to six inch long pen, then life gets
a bit more complicated. All of a sudden you have to think about reflections, lighting
shinny metal, rendering fine details, extreme close-up (macro) focus, depth of
field, post processing (Photoshop) and resolution for web or print, to name just
a few.
But like most things, with the proper amount of patience, practice and guidance
these problems can be conquered.
Let’s start at the beginning. (*Please note -- I apologize that some
of this information will be very basic and mundane for those already creating
good images of their pens, but this will hopefully bring everyone up to the same
level. Thank you for your patience.)
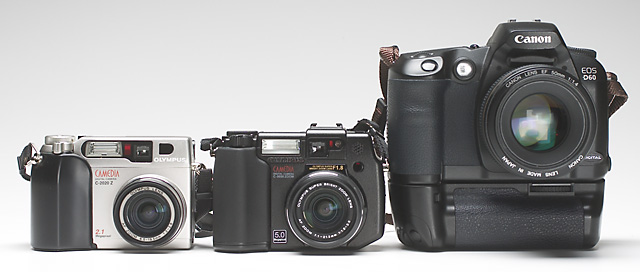
The Camera
What camera (brand) you own is of no consequence as long as it has the right features.
For good photos of pens you should have the following (in no particular order):
- The ability to focus very closely, often called macro. This will allow you
to fill the image area with the subject whether it’s a whole pen, a nib,
a piece of the cap ring or anything in between.
- The option of using the camera in manual mode or an automatic mode where
you set the lens f-stop. The smaller the f-stop number the more depth of field
(area in focus) you will obtain.
- The ability to focus the camera manually. While you can often work around
this, in my experience this feature is needed often enough to make it into the
top seven “should haves” list.
- Exposure compensation or manual exposure override. There are times when your
camera will under or over expose a pen just because of the way the built in meter
works. This is not the fault of your camera, they all work the same way, we just
have to outsmart ‘em.
- The ability to make an exposure without touching the camera via a standard
cable release, an electronic remote release or a self-timer feature. Taking the
picture without physically pushing the button will greatly reduce camera shake
which is a primary source of blurry photos.
- A socket on the bottom of the camera for attaching to a tripod or other support.
- The ability to create a custom white balance. This feature will allow you
to make precise color correct images under almost any lighting.
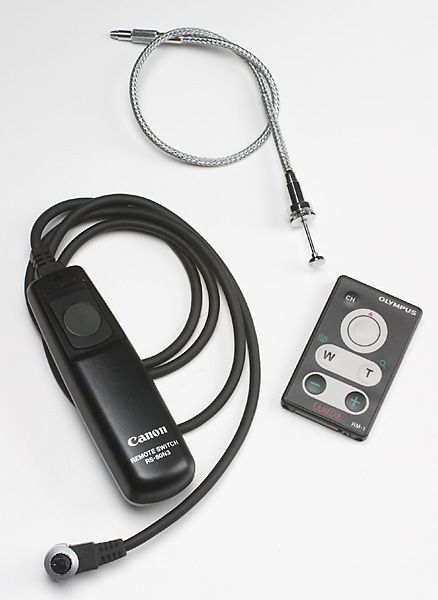
cable releases
It should be noted that no where in the above list is there any mention of
the term “megapixel”. The megapixel count of your camera can vary
anywhere from 2 to 14 depending on model and amount of money you spend. What you
need depends on the purpose of your pictures. If all you ever want to do is make
pictures for the web then even a two megapixel camera is overkill, however, if
you wish to make 11x14 inch photos for your wall you should have at least a five
or six megapixel camera. Bigger is better, sometimes.
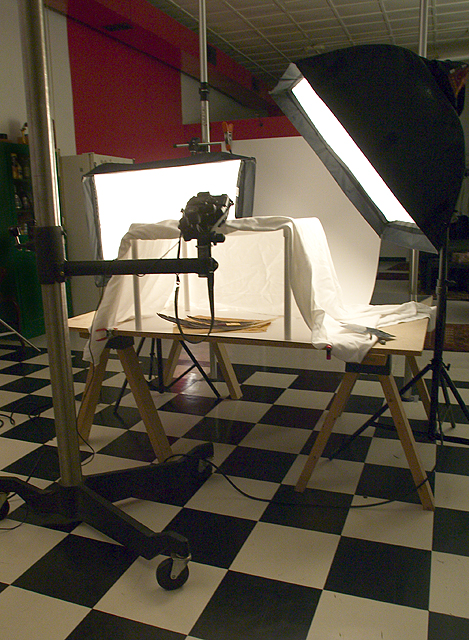
Terry's Studio
Lighting for pens
Now we come to one of the most important parts of the photograph -- lighting.
This is one of the key elements that separates a good photo from a bad snapshot.
It’s also one of the most complex subjects in photography. We’ll examine
this topic in several steps building and expanding as we go, for without a good
base of knowledge it’s all just a house of cards when something doesn’t
go right.
There are two main categories of lighting -- hard light and soft
light.
Hard light
When you use light, one source or many, without diffusion it’s called ‘hard
light’. The source can be anything from a blue photo bulb, a desk lamp,
electronic flash, or the sun -- anything at all as long as it is pointed directly
toward the subject. The result is a very high contrast, harshly lit picture with
bright spotty highlights and little or no shadow detail. This is the most unflattering
kind of light to use when photographing pens but one often seen when viewing internet
auctions.
Soft light
Soft light is just that, a light that provides soft even illumination to the subject
with open shadows allowing full rich detail to be seen throughout the picture.
Soft light is one of the keys to good pen photos.
There are many options of how we go about achieving soft light. For those
so inclined, there are several commercially available accessories on the market
designed specifically for small object photography thanks to the rapidly growing
on-line auction market. The Cocoon and The Box are two such devices. While adequate
to the basic task, these appliances can be limiting because of their size and
intended purpose. The alternative is to build your own.
Let me state right now for the record, in my experience no one single lighting
accessory will fill every need. Each has it’s application and limits. Thankfully,
if you build your own you can have several things that together will provide you
with near limitless possibilities for less total cost than any one commercially
produced product. Which device you choose depends on the purpose and intent of
the final picture.
Next time: Light Cones, Light Tents,
Reflectors and the basic "record shot"
Terry Clark has been a professional
photographer for more than 25 years.
He specializes in location and studio digital photography for commercial, advertising
and editorial clients worldwide. He is based in Pittsburgh, Pennsylvania and represented
in NYC by Black Star Corporate. He can be contacted at:
terryclark.photo@verizon.net.
|